Shipping within 21 business days
Check out all our European shipping rates

The Merge Tool in MyCaseBuilder allows you to combine two or more individual shapes into one clean, continuous cutout. This is especially useful when the shape you need is not available as a standard item in the Shape Library or when you want to create a more complex, customized compartment.
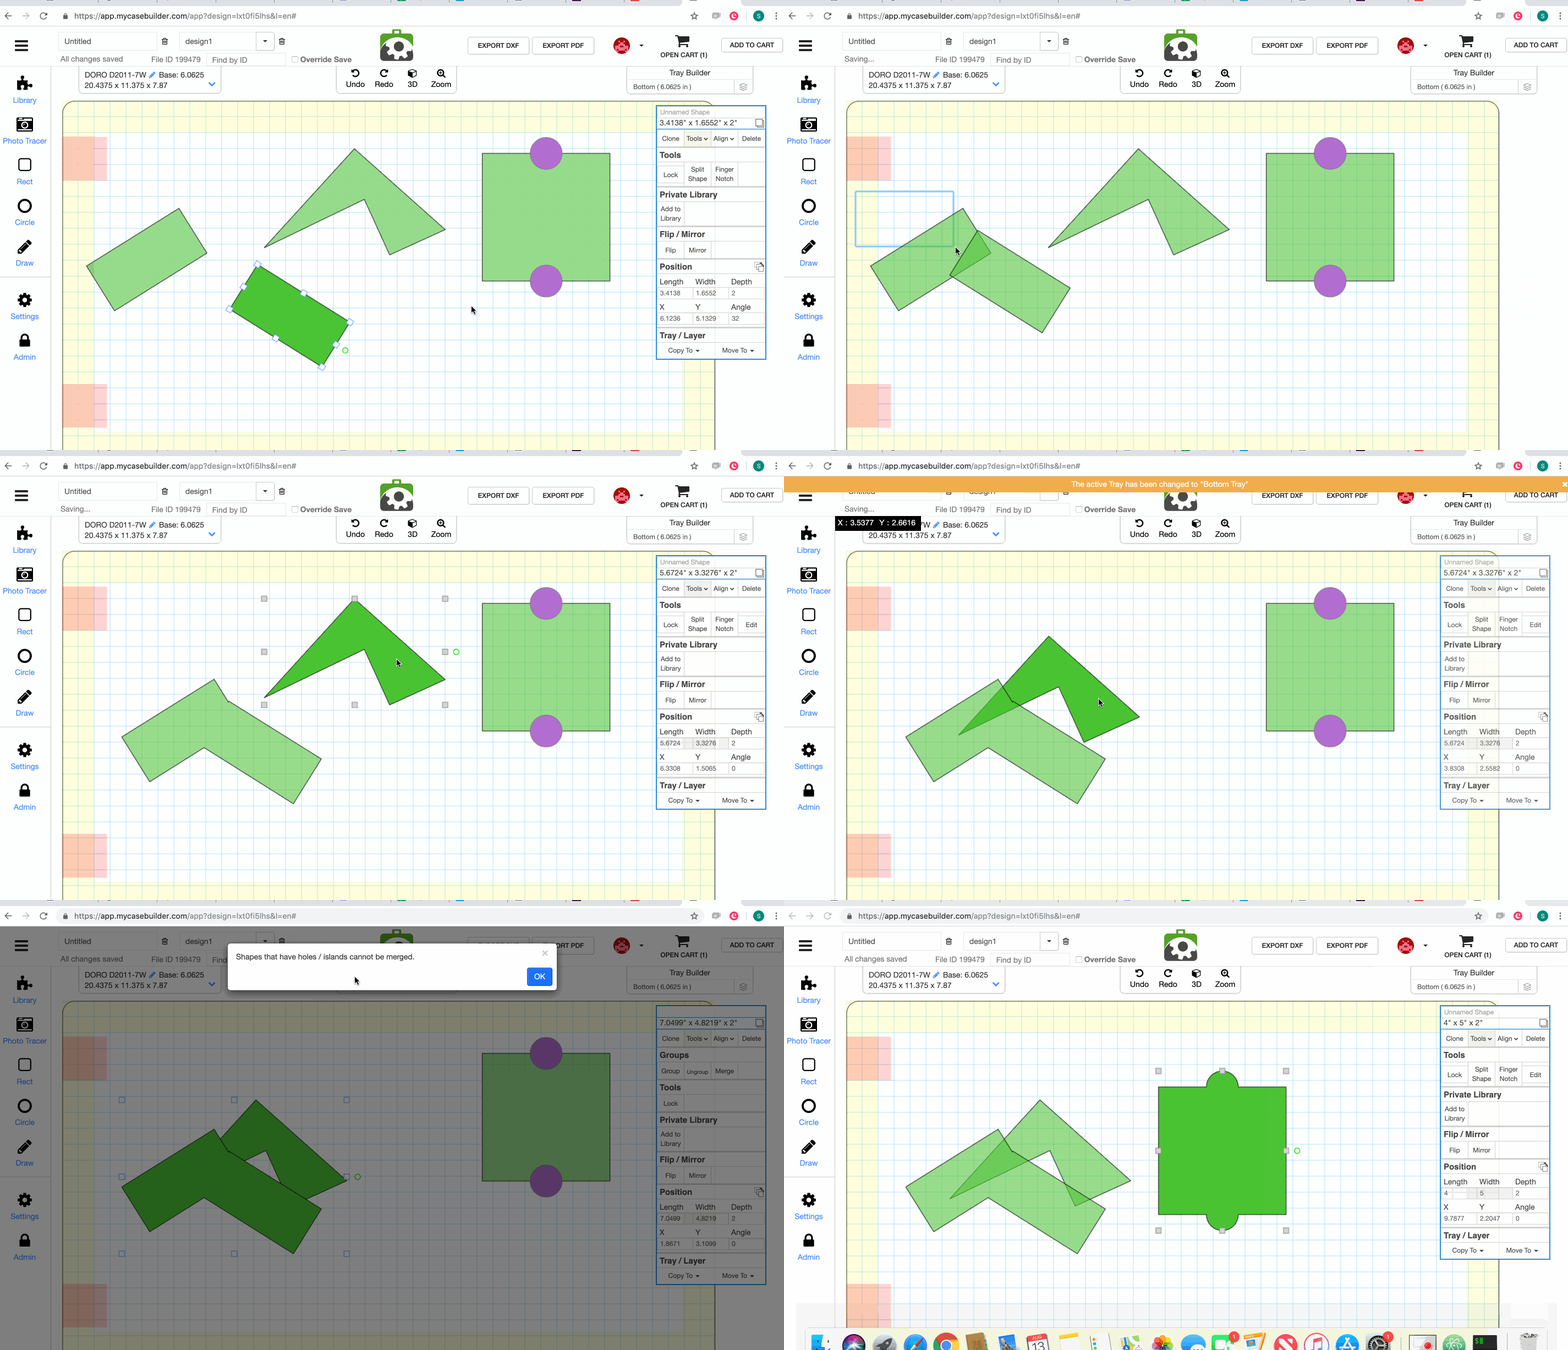
You can build your desired cutout by placing several standard or custom shapes on the design canvas. Position and resize the shapes until they form the outline you need. Once the shapes are correctly aligned, select them together.
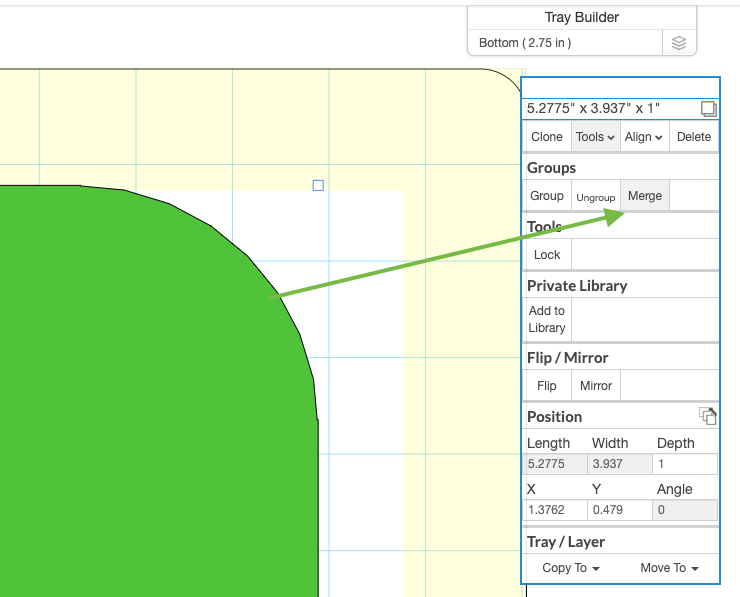
When the selected shapes are suitable for merging, the MERGE button will appear in the menu on the right-hand side of the screen. Click this button to combine the individual shapes into a single cutout.
This creates a cleaner design and makes it easier to move, position, and manage the completed shape within your foam layout.
When you select applicable shapes you will see the MERGE button in the menu on the right.
For the Merge Tool to work correctly, the selected shapes must meet the following conditions:
If the MERGE button does not appear, check whether all selected shapes have the same depth and are sufficiently overlapping. You may need to reposition or resize one or more shapes before trying again.
The Merge Tool gives you additional flexibility when designing a custom foam insert. By combining simple shapes, you can create a precisely tailored cutout for equipment, tools, accessories, or other uniquely shaped items—all directly within the MyCaseBuilder design environment.